Can you remotely control your Raspberry Pi from anywhere in the world, securely and with ease? The power to access your Raspberry Pi from any Windows machine, no matter where you are, is not just a convenience; it's a gateway to limitless possibilities.
The ability to remotely access your Raspberry Pi is a game-changer for a wide array of applications, from managing home automation systems to developing and debugging software. Secure Shell (SSH) provides a robust and encrypted connection, allowing you to manage your projects, troubleshoot issues, or even run a home server, all from the comfort of your Windows machine. This comprehensive guide will walk you through the essential steps, ensuring a secure and reliable connection, regardless of your location. We will cover setting up your Raspberry Pi, configuring your Windows machine, and provide solutions to common issues, enabling you to harness the full potential of your device.
| Objective | Establishing a secure and reliable SSH connection to a Raspberry Pi from a Windows machine. |
| Technology Used | Raspberry Pi, Windows 10/11, SSH Client, Network Connectivity |
| Prerequisites | Raspberry Pi with operating system installed, a network connection, and a Windows machine. |
| Key Steps |
|
| Benefits |
|
| Reference Website | Raspberry Pi Official Website |
The first crucial step is to identify the IP address of your Raspberry Pi. This unique network identifier is essential for establishing a remote connection. To find it, you can access the terminal on your Raspberry Pi. Once you have the terminal open, you can use specific commands to display the IP address assigned to your device. Keep this IP address handy, as you'll need it to connect from your Windows machine.
Enabling SSH on your Raspberry Pi is the next vital step. Fortunately, this is a straightforward process. If you're using Raspberry Pi OS with a desktop environment, you can typically enable SSH through the configuration tool found within the graphical interface. For those using Raspberry Pi OS Lite, you can configure SSH during the initial setup when you're flashing the SD card. This is usually done by enabling "SSH" in advanced options.
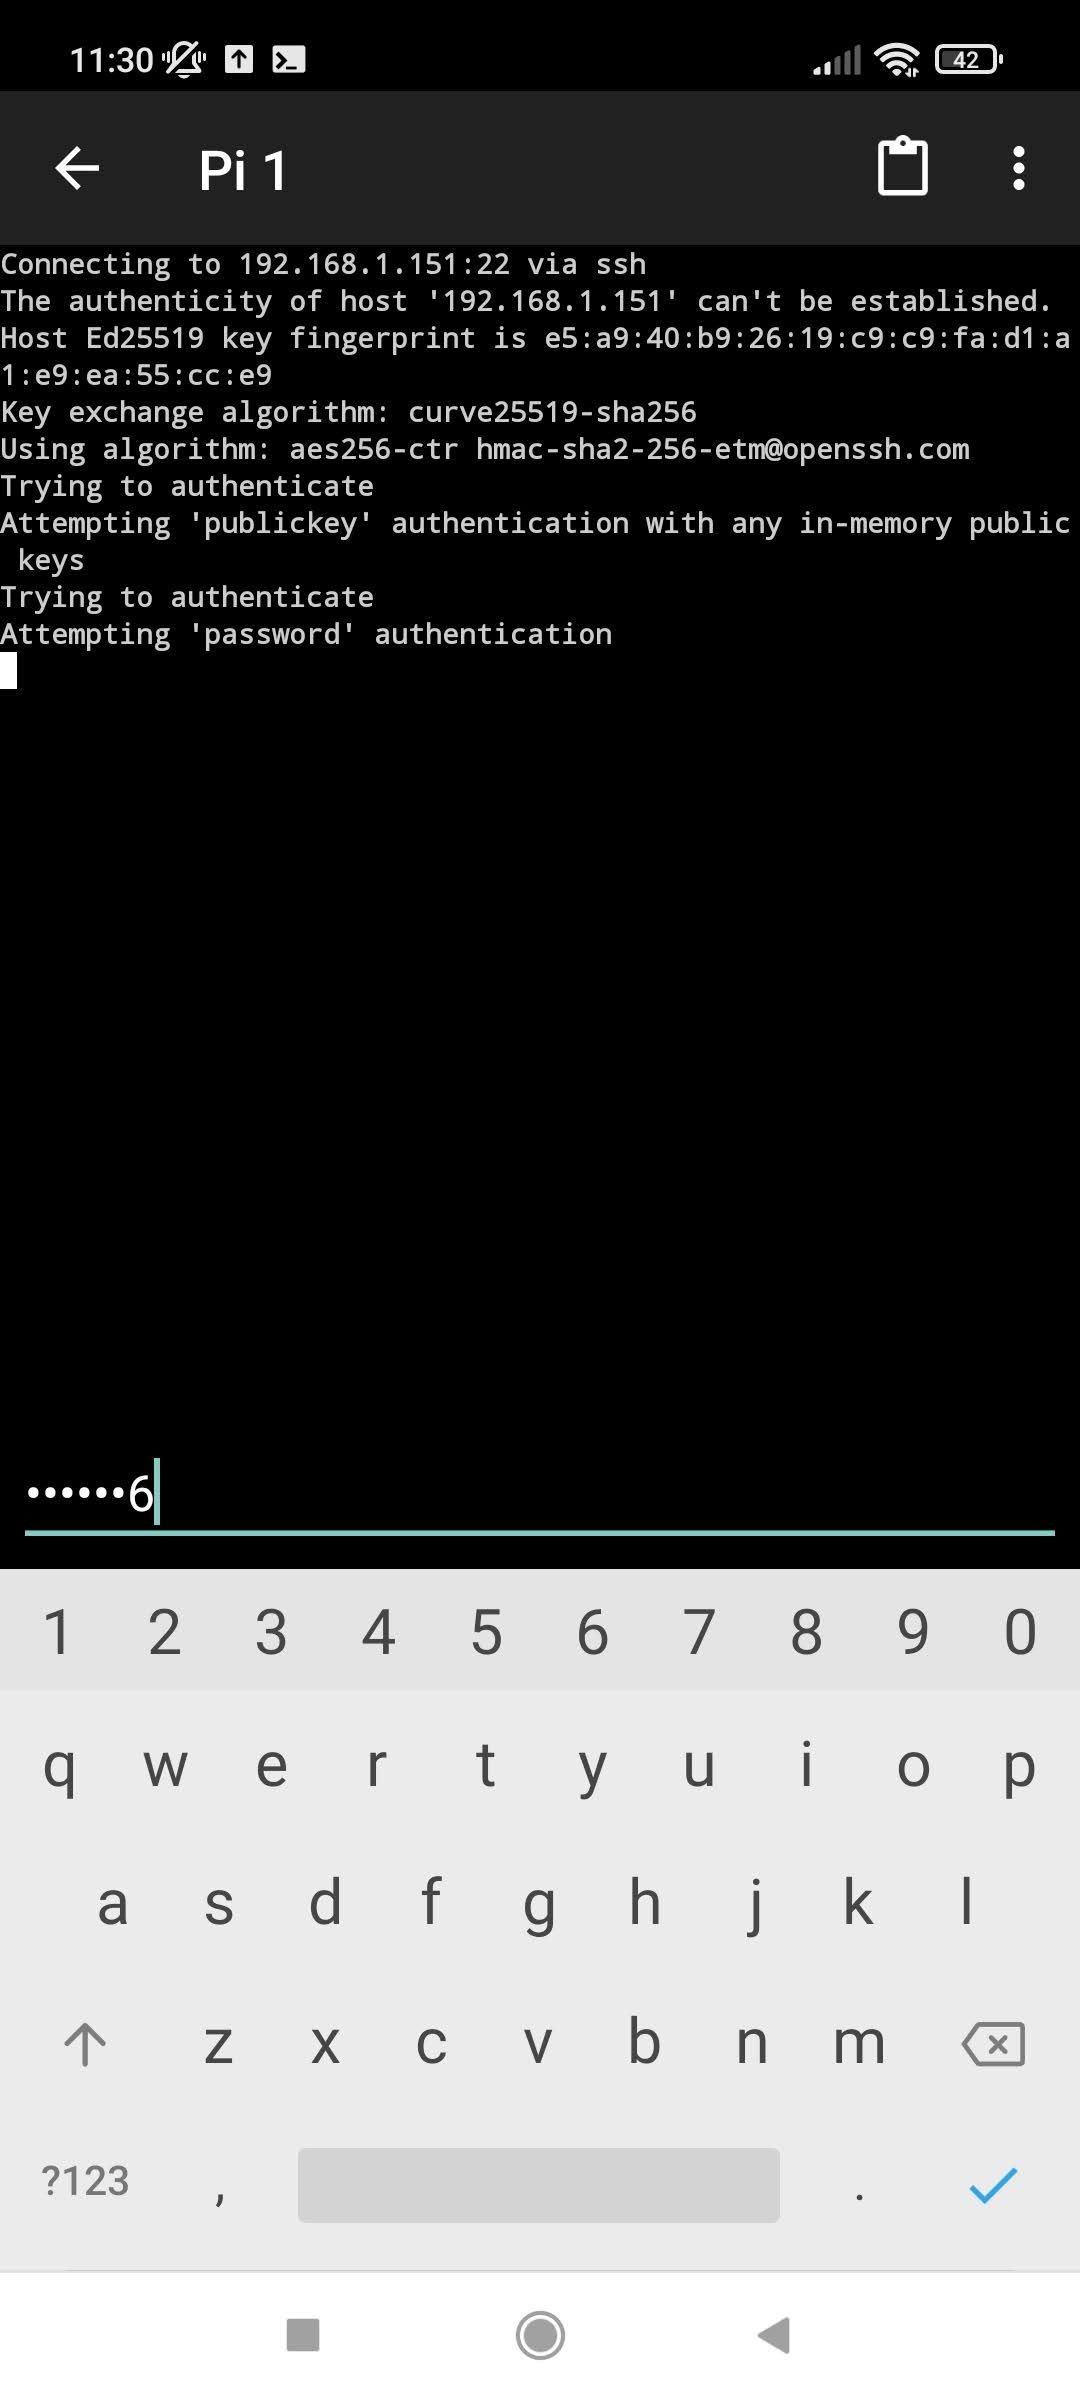
With SSH enabled on your Raspberry Pi and the IP address noted, the next phase involves configuring your Windows machine. Windows 10 and later versions include an SSH client by default, making the setup process incredibly convenient. If you're using an older version of Windows, you'll need to install an SSH client such as PuTTY. Once the SSH client is installed, you'll be able to open a terminal and initiate a connection to your Raspberry Pi. To do this, you will input the Raspberry Pi's IP address, your username (usually 'pi'), and your password. Following these steps should securely connect you to your Raspberry Pi from your Windows Machine.
When using SSH, security should always be a priority. It's crucial to understand the potential risks associated with remote access. To enhance security, consider changing the default password for the 'pi' user and implementing additional security measures such as key-based authentication instead of password authentication. This involves generating a key pair (a private key and a public key) and placing the public key on the Raspberry Pi. When you connect, the SSH client uses the private key to authenticate, which is much more secure than relying on a password alone.
For those just starting, the simplicity of SSH may come as a surprise. SSH allows you to not only get a remote terminal but also to run a wide variety of projects. After logging in, you have complete control of your Raspberry Pi's command line. This access is particularly valuable for running and managing various software projects, and it is extremely effective to use the command line.
To make the remote access experience even more seamless, you can use a tool like Visual Studio Code (VS Code). VS Code allows you to remotely connect to your Raspberry Pi using the SSH extension. With this method, you can edit files, run Python scripts, and more, directly on your Raspberry Pi from the familiar VS Code environment on your Windows machine. This greatly simplifies the workflow for developers and anyone who wants to program on their Raspberry Pi remotely.
The command `ifconfig` can be used on the Raspberry Pi terminal to find the IP address. This command outputs information about all network interfaces on your Raspberry Pi. Look for the interface associated with your network connection (e.g., eth0 for a wired connection, wlan0 for Wi-Fi) and find the inet address. This is the IP address of your Raspberry Pi. The IP address is essential. Without it, you cannot initiate a connection to your Raspberry Pi from your Windows machine.
Accessing your Raspberry Pi remotely extends far beyond simply entering commands. SSH provides access to the Pi's underlying Linux operating system, allowing you to perform many operations remotely. You could use tools like VS Code for remote file management and editing. Running a Python file remotely can be done easily by calling the `python` command, followed by the name of the file on the terminal window.
This setup allows you to effectively manage your projects, troubleshoot issues, or even run a home server from anywhere, as long as you have an internet connection. Whether you're a beginner or an experienced user, the ability to remotely manage your Raspberry Pi is an invaluable skill.
In situations where you are having trouble, there are a few common issues. Make sure both the Raspberry Pi and your Windows machine are connected to the same network. Double-check that SSH is enabled on your Raspberry Pi. Verify that you're using the correct IP address, username, and password. If you are having problems, recheck these basics. Often, simply rechecking the basics is all that's needed.
Remote access to your Raspberry Pi is incredibly helpful for many projects. You can have secure and reliable remote access to your Raspberry Pi without any cost, allowing you full control of your device.
Mastering remote access to your Raspberry Pi is within reach. With the information and steps provided, you can connect to your Raspberry Pi from anywhere with ease. This capability ensures that you have complete control over your device, regardless of your location.